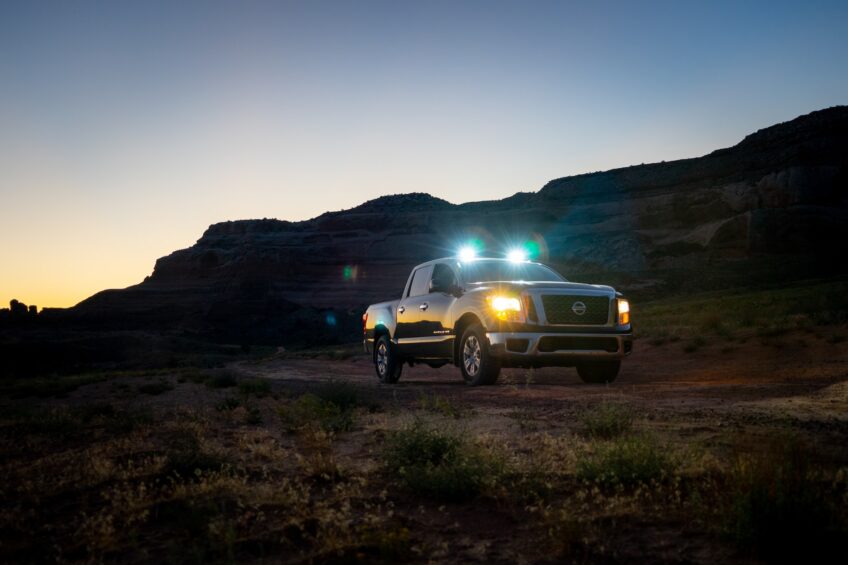
Off-roading at night can be an exhilarating experience, but without proper lighting, it can also be dangerous. That’s why many off-road enthusiasts choose to install off-road lights on their vehicles. However, wiring these lights can be intimidating, especially for those who have never done it before.
In this article, we will guide you through the process of wiring off-road lights to high beams in a few easy steps. Whether you’re a seasoned off-road enthusiast or a beginner, our step-by-step instructions will help you get your off-road lights up and running quickly and easily. So, get ready to shine, and let’s get started!
Preparation
Before wiring your off-road lights to your high beams, make sure you have all the materials. Necessary tools include tape, wire cutters, connectors, and a wiring harness. Check that your off-road lights are working and know where they’ll be mounted. Once these steps are done, you can go ahead and wire them to your high beams.
Gather the necessary materials

To wire them, you’ll need some things. Wiring – 12 AWG or thicker according to wattage. Pliers or another tool to strip and manipulate the wires. Wire cutters, electrical tape, and butt connectors for thicker gauges. Plus, zip ties to tuck away the wiring.
Be aware of state laws on what lights can be used and how. Before proceeding, make sure you know these laws.
Read the instructions for the lights
Before wiring them to your vehicle’s high beams, read the instructions. Make sure to check the wattage and voltage of each light. This helps prevent damage to your car’s electrical system.
Plan your route, and make sure it’s safe. Keep things neat and organized when routing wires. Cut longer lengths than needed. Secure connections away from heat sources with tie wraps.
Pay extra attention in wet areas. Moisture can corrode connections quickly here.
Lastly, use properly shielded wires. These can create interference with vital electronic systems. Use wires designed for such applications if needed or required by local codes.
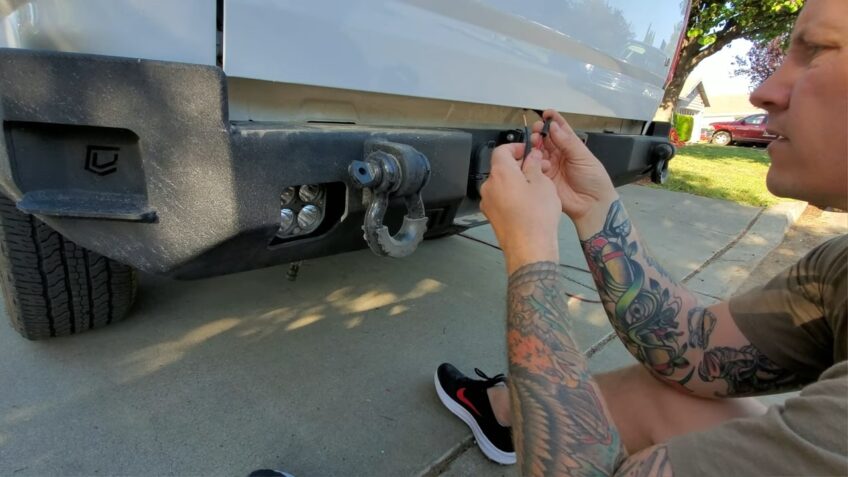
Mount the Lights

First, check you have the right lights, switches, connectors, and wiring. Next, start the mounting process. Attach the lights to each side of the car. Pick a secure place for them – make sure they don’t get in the way of anything else.
Determine the best location for the lights
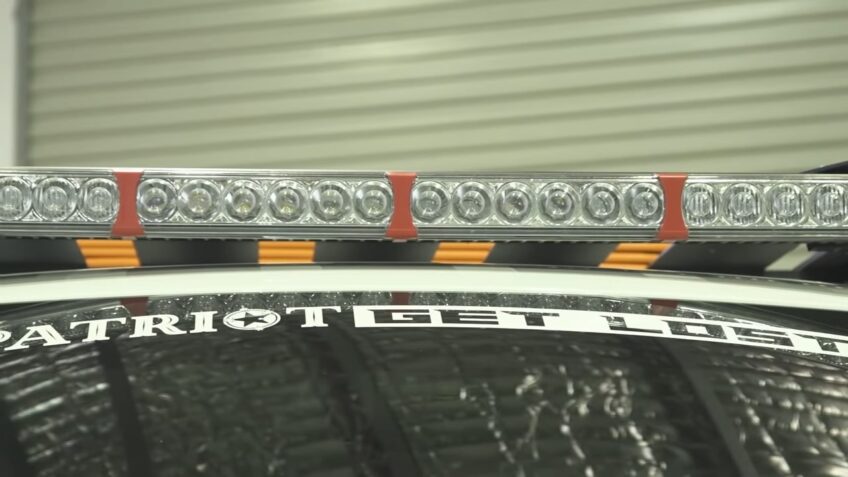
Decide what type of lights you want to add to your vehicle. Place them on the front so that they light the area with minimal light spillover. Make sure the lights don’t exceed legal height or width limits.
Have at least four mounting points for each set of lights. Include all wiring and hardware before installation. The mounting points can be holes, or clamps – depending on what’s available. Secure each light in its location.
As a safety precaution, check that all metal surfaces are clean and free of rust before attaching any components. This prevents corrosion and ensures a secure connection.
Secure the lights on the vehicle
Secure the lights to the vehicle exactly where you want them. Make sure all mounting hardware is connected securely.
All wiring must have enough gauge to supply the right current load from the battery to each light. This is especially important for multiple lights. If the wire is too small, it can cause failing relays and fuses, which means the lights won’t turn on.
Connect the Lights to the High Beams
For a better view when driving Jin the dark, connecting them to the high beam switch is the way to go. So, let’s get started!
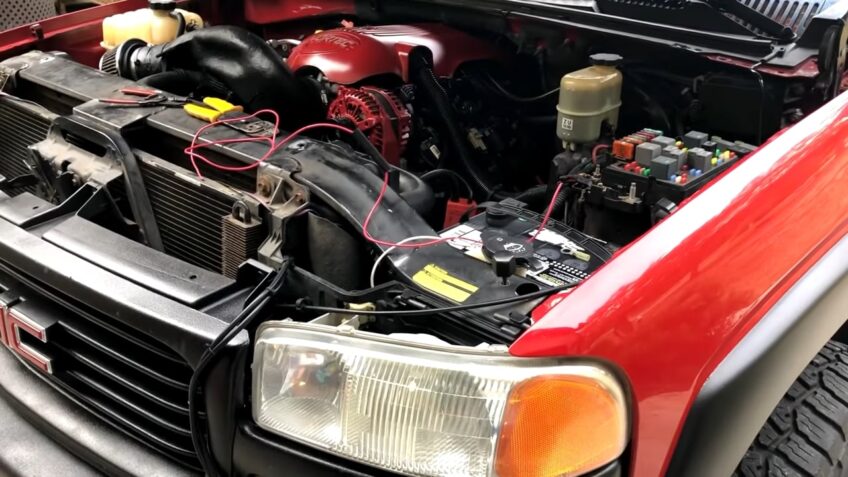
Connect the power wire to the high-beam switch
Connecting power for off-road lights is easy, but you must be careful. No matter how many lights you have, it needs to go to the high-beam circuit.
Find the headlight switch and locate the two wires. The low-beam wire is not necessary. The black one should attach to the positive terminal (12 VDC) of your new lights. Then, connect it to the high beam circuit.
Consult your car’s wiring diagram for extra details. Usually, just put the power wire from the lights in an empty slot in the switch connector. Test it with a voltage meter first.
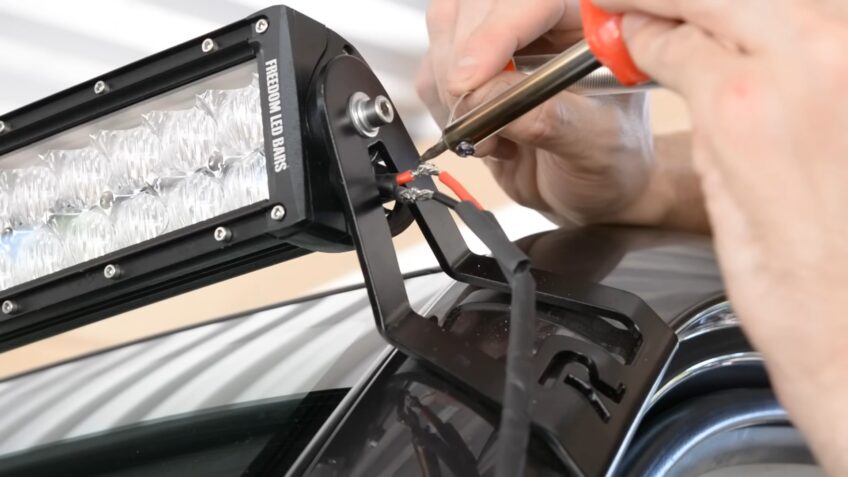
Secure the wires and connection points with electrical tape. Cover up any exposed wiring with a sheath or protective cover designed for cars. This will protect against heat or other road hazards that could damage the wires and connectors.
Connect the ground wire to the vehicle’s frame
It’s essential to attach the ground wire from the off-road lights securely to the vehicle’s frame. This stops any electric shock if there’s not a proper bond. The most straightforward way is to run a separate ground wire from each light and join it directly to an unpainted, rust-free part of the frame. You may need to use a grounding plate where each ground wire links to make the connection perfect.
Connect the switch wire to the high-beam switch
Connect a switch wire from the battery-positive terminal to the “on” position of the switch. This will ensure that when switched off, it uses minimal current. Then, connect the other terminal of each light’s switch wire to its positive terminal or power lead (usually red).
Next, connect one end of another wire (preferably thicker) from each light’s negative terminal or ground lead (usually black), towards the headlights and hook it into its high beam switch. Double-check all wiring connections for any issues before testing out lighting functions in outdoor and indoor conditions.
Test the Lights
Before wiring them, test them! Ensure they work, are mounted right, and output the correct amount of light. Understand how the light setup works first.
Let’s review how to test them properly:
Check all connections for tightness
Check all connections for tightness before connecting your off-road lights to the vehicle’s high beams. This includes side terminal wire connectors on the fuse block or relay and crimped spade or ring terminals connecting wires to switches and lights. Loose wires can cause arcing and generate heat. This can melt the insulation and cause a fire, so it is best practice to use electrical grease when making any electrical connection.
To make sure the wiring is connected properly, use a voltage tester. If all wiring is in order, you will get power back from any hot leads tested with the tool.
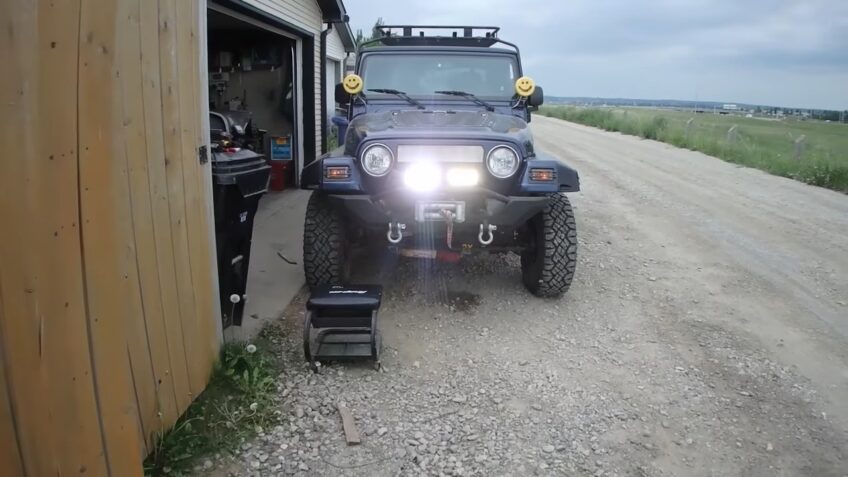
Turn on the high beams and check that the lights work
Turn on your high beams to easily identify the correct wiring and make sure all the connections are secure. Test the lights to make sure they are functioning properly. Inspect the ground-side wires connected to off-road lights and check for any loose connections or other damage.
Test each individual light by turning it on and making sure it responds when receiving a signal from the high beam. Adjust the headlight switch between low and high beams to see if each light responds to different levels of illumination. Replace any broken wires or bad connections before closing up.
Now you’re ready to hit the road, safe in the knowledge that your off-road lighting system won’t let you down!
Final Touches
Wired the lights? Ok! The last bits need to be done. Turn the switch on and off, connect the power wire to the battery, and make sure the lights turn on when using the high beam.
Let’s have a look at each one in detail.
Secure any loose wires
Finally, it’s time to secure any loose wires. Use rigid zip ties for a grip. Or, use metal clips for a tighter grip and easy removal if access is needed again. Keep the wiring neat to avoid accidents. Once all wires are secured, snap covers back into place to complete the installation.
Test the lights one more time
Turn the car’s engine on and switch the ignition to “on.”
Test the relay by switching from low beam to high beam. Check that the wires are connected correctly and all connections are secure.
Turn on the high beam and flick each light switch one at a time to make sure each off-road light is lit. Once each light is lit, press both switches at once and check they all work together. Test dimming too.
Adjust any headlights if needed and when finished, turn off the engine. This final step will give you confidence that your off-road lights have been wired correctly and that you’re ready for any terrain!
Understanding the legal and safety considerations for wiring off-road lights to high beams
When it comes to installing them on your vehicle, it’s important to understand the legal and safety considerations involved. While they can be a valuable addition to your vehicle for off-roading adventures, it’s crucial to ensure that they are installed correctly and in compliance with local laws and regulations.
First and foremost, it’s important to ensure that the off-road lights you’re installing are legal in your area. Different jurisdictions have different rules and regulations regarding them, including the type, color, and location of the lights. Make sure to check your local laws and regulations before beginning your installation.
Another important consideration is the brightness and positioning of your off-road lights. These lights can be extremely bright, and improper positioning can lead to glare and decreased visibility for other drivers on the road. Make sure to position them in a way that doesn’t blind other drivers or obstruct their vision.
Finally, remember that off-road lights are designed for use off the road and should not be used on public roads unless legal and necessary. Using off-road lights on public roads can lead to accidents and legal trouble, so make sure to turn them off when driving on public roads.
Tips for maintaining and cleaning your off-road lights for optimal performance
Maintaining and cleaning them is crucial for ensuring optimal performance and longevity. Off-road lights are exposed to various weather conditions and can get dirty quickly, so regular maintenance and cleaning are essential. Here are some tips for maintaining and cleaning your off-road lights for optimal performance:
- Regularly inspect them for damage, such as cracks or moisture buildup, and replace any damaged parts promptly.
- Clean them regularly using a soft cloth and mild soap and water. Avoid using abrasive materials or harsh chemicals that can damage the light’s lens or housing.
- Use a protective cover or guard to prevent damage to your off-road lights when not in use.
- When installing new ones, make sure to properly seal the connections to prevent water or moisture from entering the light housing.
- Use a high-quality wax or sealant to protect them from UV damage and maintain their appearance.
- When driving off-road, make sure to turn them off when not needed to avoid overheating or damaging the bulbs.
- If they become foggy or hazy, use a specialized lens cleaner to restore clarity and brightness.
- When storing your off-road lights, make sure to store them in a dry, cool place away from direct sunlight or extreme temperatures.
- Check the wiring and connections of your off-road lights regularly to ensure that they are secure and functioning properly.
- If your off-road lights are not functioning correctly, such as flickering or dimming, it may be a sign of a wiring or electrical issue. In this case, it’s best to have a professional diagnose and repair the problem.
By following these tips for maintaining and cleaning your off-road lights, you can ensure that they perform at their best and last for years to come. Regular maintenance and care can also help prevent costly repairs or replacements down the road.
FAQs
What tools and materials do I need to wire off-road lights to high beams?
You will need wire, connectors, a switch, a relay, and basic electrical tools like pliers and wire strippers.
Can I install off-road lights myself, or do I need to hire a professional?
If you have experience working with electrical systems, you can install off-road lights yourself. Otherwise, it’s recommended to hire a professional.
Can I wire multiple off-road lights to high beams?
Yes, you can wire them as long as the total wattage does not exceed the maximum allowed for the circuit.
Can I use a switch to turn my off-road lights on and off instead of wiring them to high beams?
Yes, you can turn them on and off independently of your high beams.
How do I troubleshoot wiring problems with my off-road lights?
Check for loose connections, damaged wiring, or a faulty switch or relay. Use a multimeter to test for continuity and voltage.
How do I clean and maintain my off-road lights?
Regularly clean them with a soft cloth and mild soap and water. Use a specialized lens cleaner to restore clarity and brightness.
Can I use LED off-road lights instead of halogen or HID?
Yes, they are a popular choice due to their low power consumption, long lifespan, and high brightness.
How do I ensure that my off-road lights are positioned correctly?
Make sure that they are positioned in a way that does not obstruct other drivers’ visibility and is legal in your area.
Can I use off-road lights on public roads?
No, they should only be used for off-road driving and are not legal for use on public roads in most areas.
Conclusion
Wiring off-road lights to high beams is a great way to improve visibility while off-roading at night. By following the easy steps outlined in this article, anyone can wire off-road lights to high beams in no time.
Remember to always take safety precautions when working with electrical components, such as disconnecting the battery before beginning and using the right tools and materials. Additionally, be sure to check your local laws and regulations regarding off-road lights to ensure that your installation is legal and safe.
With your off-road lights wired to your high beams, you’ll be able to illuminate the night and enjoy your off-roading adventures with increased safety and confidence. So, get ready to shine and light up the trails like a pro with your newly installed off-road lights!