
The clear coat of your car plays a crucial role in keeping its paint job intact and protected against harsh weather conditions, UV rays, and general wear and tear. However, over time, the clear coat may start to peel off, leaving your car looking unsightly and prone to damage. Fortunately, you don’t have to spend a fortune at the auto shop to fix this issue. With a little bit of knowledge and effort, you can easily revive your car’s paint job and restore its former glory. In this guide, we’ll take a closer look at how to fix a peeling clear coat like a pro, from identifying the root cause of the problem to choosing the right tools and products and following the proper steps to ensure a flawless finish. Whether you’re a seasoned car enthusiast or a complete novice, you’ll find everything you need to know to get the job done right and make your car shine like new again.
Preparation
The process of repairing a peeling clear coat on a car starts with careful preparation of the affected area. You will want to ensure that the area is clean and free from debris before beginning the repair process.
It is important to check the surface of the car to make sure that there are no scratches, cracks, or other damage that could be made worse by the repair process. Additionally, you should gather all the necessary tools and materials before starting this job.
Clean the area with soap and water
The first step is to clean the area with soap and water. Use a soft cloth or sponge to remove any dirt or debris from the surface of the car. Be careful not to scrub too hard, as this may damage the clear coat further.
Once you have finished cleaning, let the area dry completely before moving to the next step.
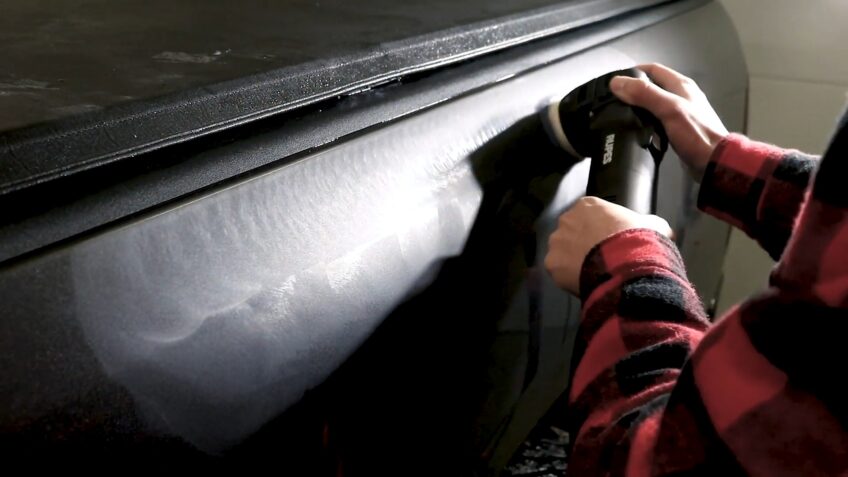
Sand the area with fine-grit sandpaper
The next step is sanding and it serves two important functions. First, it creates a rougher surface that enables a better bond between the old and new clear coat layers. Second, it removes the peeling old paint and rust, which are necessary steps in preparing the area for the new layer. To sand the area properly:
- Examine where the peeling occurred on your car and mark off a square around this area with masking tape. This will help you to stay focused on just one section instead of over-sanding other areas nearby.
- Start sanding with 320 or 400-grit fine-grit sandpaper, to break down any large chunks of peeling paint and remove rust lightly until this area is smooth again.
- Switch to 600 or 800-grit sandpaper to create an even smoother finish before applying a new clear coat.
- Sand in one direction using gentle strokes of your hand as you work your way around the outline made with masking tape — this will keep you from making uneven patterns in your repair job as well as helping you focus on one specific area while avoiding accidental dispersal of dust particles onto other parts of the car’s finish.
- When finished, remove all dust particles left behind by wiping them down with glass cleaner or blowing them away with an air compressor before applying clear coat primer resin – this is an essential step to make sure that no dust blocks or reduces the longevity of your repair later on after adding new layers of clear coat paint to the vehicle’s damaged surface.
Wipe the area with a damp cloth
Before attempting any repairs, the affected area on your car must be properly prepared. To prepare the area with clear coat peeling, use a damp cloth to gently wipe the loose paint and other debris from the surface. It’s important to remove all of the loose material before proceeding with repairs; otherwise, any new paint you apply might not bond correctly to your car’s surface. You may want to use an old toothbrush or cotton swab in order to reach into crevices or areas where large pieces are flaking off.
Once you’re satisfied that the area is clean, you should dry it thoroughly with a soft cloth before applying any fillers or primer.
Applying Primer
As part of this process, applying a primer is necessary for a few reasons. Primer helps provide a base for the new clear coat to adhere to and helps smooth out any imperfections on the surface. It also helps protect the metal of the car body from rusting, which can occur if the clear coat is not adequately sealed.
Let’s discuss how to apply primer to a car body.
Apply a thin coat of automotive primer
Once the surface is clean and dry, you can begin applying the automotive primer. A primer is a product that goes between the base coat or topcoat and the car’s metal to help protect it from rust and corrosion. When applying a primer, use a fine brush or a foam roller for the best results. The thickness of your coat will depend on the type of primer you are using, so check the manufacturer’s instructions before applying it.
For example, if you are using an acrylic primer, be sure to apply two to three thin coats that cover all of the surfaces evenly and completely. Allow each coat sufficient time to dry before adding another layer. Once you have applied all of your primers correctly and let them dry properly, you are ready to begin sanding down any remaining imperfections in your car’s finish before finally refinishing it with a fresh clear coat.
Allow the primer to dry completely
Allow the primer to dry completely before moving on to the next step. Depending on the type of primer you use and the temperature and humidity of your environment, drying times may vary. Generally, it’s best to allow at least 24 hours for full curing and drying — even if a surface feels dry to the touch, wait at least one full day before proceeding as a complete cure is necessary before continuing.
To be sure that it has dried properly, wait until you can no longer detect any trace of stickiness or tackiness on a finger when lightly rubbed against the primed surface. This will make certain that mildew or adhesion problems are not created during painting later.
Applying Clear Coat
Clear coats provide protection from UV rays and oxidation, as well as improve the overall look of the car.
With the right tools and materials, applying a fresh coat of clear coat to your vehicle can be a straightforward endeavor.
Keep reading to learn the basics of applying a clear coat to a car.
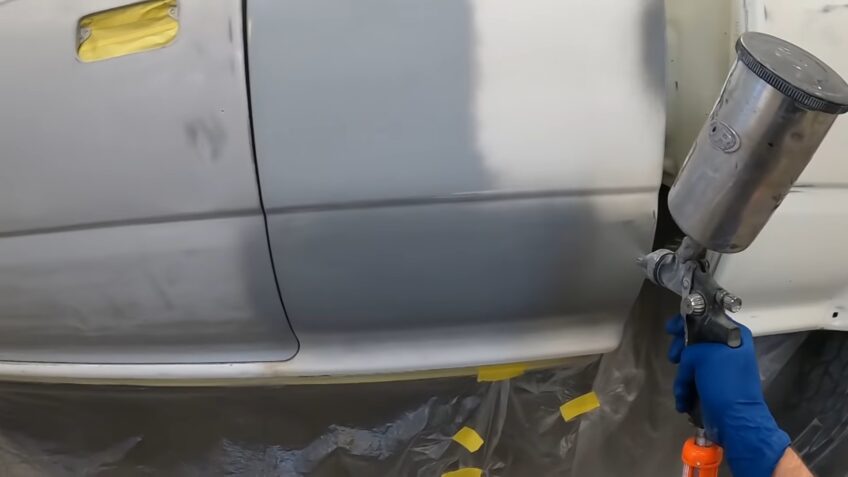
Apply a thin coat of automotive clear coat
Using a spray can of automotive clear coat, apply a thin coat in even strokes over the surface. Allow it to dry before adding another layer until you achieve the desired finish. Make sure not to apply too much; this can cause the layer beneath to crack or peel too easily. It’s also important to shake the container of clear coat for two minutes prior to spraying and make sure temperatures are over 55°F for an optimum result.
Allow the clear coat to dry completely
After you have applied your new clear coat, it is important to allow the area to dry completely before attempting to sand or polish it. Clear coats are typically oil-based, meaning it takes much longer for them to dry than a regular paint job. Allow the clear coat to settle for at least 24 hours before you proceed with any further steps.
During this time, monitor the area closely and make sure that no moisture or dust remains in the air around your vehicle. Once the clear coat is completely dry, you can begin sanding and polishing – but not before!
Finishing Touches
Once you have given your car a new coat of clear coat and sanded down the imperfections, it is time to take care of the finishing touches to further protect your car.
In this section, we will discuss the steps you need to take to fix the peeling clear coat on your car, giving it a brand-new shine.
Apply a second coat of clear coat
Once you have applied the first coat of clear coat and allowed it to dry, you will then want to apply a second or third coat of clear coat. This will help provide your car with an even finish, as well as protect it from the elements.
Make sure to keep a wet edge when applying the different coats, this helps ensure that you don’t get any brush or roller marks in the finish. When applying multiple coats, make sure to allow each layer of paint and clear coat to fully dry before applying any additional layers. Depending on the type of paint that was used on your car and weather conditions at the time of application, it could take several hours for each layer to properly dry.
Allow the clear coat to dry completely
After all the prep work is complete, you are ready to paint. To apply the new clear coat to your vehicle, use a high-quality automotive urethane clear and follow the manufacturer’s directions. Apply a thin layer and try to keep your strokes even and consistent. Do not put too much paint on one area. Allow each coat of clear coat to dry completely before applying an additional coat. Two or three coats should be sufficient for most applications; however, consult with a professional if you need more help in determining how many coats would be best for your car’s specific needs.
Note: Make sure to wear protective equipment when painting such as eye protection, gloves, respirators, and ventilation masks.
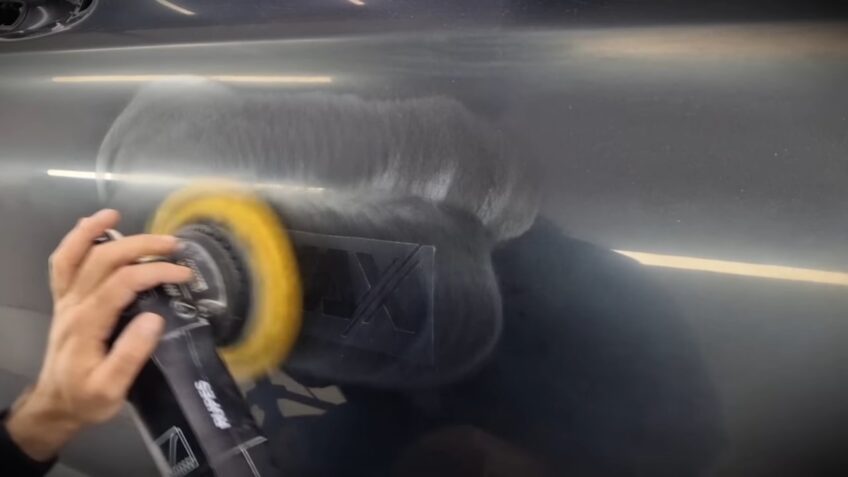
Buff the area with a polishing compound
Now that the area has been prepared, it is time to move on to the buffing process. Before you start buffing, make sure that you have the right polishing compound on hand. For sensitive areas such as clear coat paint finishes, always opt for a mild abrasive such as a nonabrasive car polishing compound. This will help to avoid over-buffing and causing more damage to your paint finish.
Once you have chosen a polishing compound, take a clean cloth or microfiber towel and fold it into four sections. Apply some of the polishing compounds to one of the sections and spread it out evenly by pressing down on the cloth with your fingers. Slowly begin to rub in small circles over the defect area in straight lines, taking care not to press too hard as this could cause further damage.
Continue rubbing until the scratches begin to disappear and switch out between sections regularly so that additional abrasives from older sections don’t accumulate and make things worse. As soon as you are done buffing with one section of your cloth, switch over to another clean one for the best results.
FAQs
How do I buff the surface after sanding?
After sanding, use a buffer and rubbing compound to smooth out the surface. Apply the rubbing compound to the buffer pad, then work it into the surface in a circular motion. Repeat this process with a polishing compound to achieve a smooth, glossy finish.
How do I apply clear coat spray paint?
Before applying it, make sure the surface is completely clean and dry. Hold the can 8-10 inches away from the surface and apply a thin, even coat. Allow it to dry for at least 24 hours before applying a second coat.
How many coats of clear coat spray paint do I need?
Typically, you’ll need 2-3 coats to achieve a smooth, even finish. However, the number of coats you need will depend on the extent of the damage and the quality of the spray paint.
Can I use a brush or roller to apply a clear coat instead of spray paint?
While it’s possible to use a brush or roller to apply a clear coat, it’s not recommended. Spray paint provides a more even, consistent finish, and it’s easier to control the amount of paint you apply.
How long does it take for the clear coat to dry?
It will usually dry to the touch within a few hours, but it’s best to wait at least 24 hours before handling or driving the car. It can take up to a week for the clear coat to fully cure, so avoid washing or waxing the car during this time.
Can I prevent the clear coat from peeling in the future?
To prevent it from peeling in the future, it’s important to regularly wash and wax your car to protect the paint job.
Conclusion
In conclusion, fixing a peeling clear coat on your car doesn’t have to be a daunting task. With the right tools and techniques, you can easily restore your car’s paint job and make it look brand new. From identifying the problem to sanding and polishing, the steps outlined in this guide will help you tackle the issue like a pro. Remember, it’s always best to address any peeling or damaged paint as soon as possible to prevent further damage and protect the overall integrity of your car’s exterior. So, grab your supplies, follow these tips, and enjoy a beautifully restored car that turns heads on the road.